Sunday, May 8, 2011

Bees

Last weekend I got the final coat of paint on the bee box and this weekend I was hoping to get it positioned somewhere up on the hill. I needed to have some kind of base that would be sturdy but also impregnable to ants. Apparently ants can do a number on bees so a lot of people have legs that can be set inside containers that hold something to prevent the ants from crossing.

Azalea and Marc and Max have very slick pipes that screw into the base of box. They look great and can be adjusted to make the box level, but when is saw how much they cost (almost $24 for all the pieces) and after spending so much for my SWCs I decided I needed to find another solution.

I scavenged around the yard and found a couple 2x4s that were long enough to do something with. I made a frame that was 16"x 6' with a couple cross braces in the middle. I figure I can fit at least two hives on here or maybe three. I always thought that bees were territorial and needed to be separated but they seem to do OK closer together. This way I don't have to build a base for each hive.


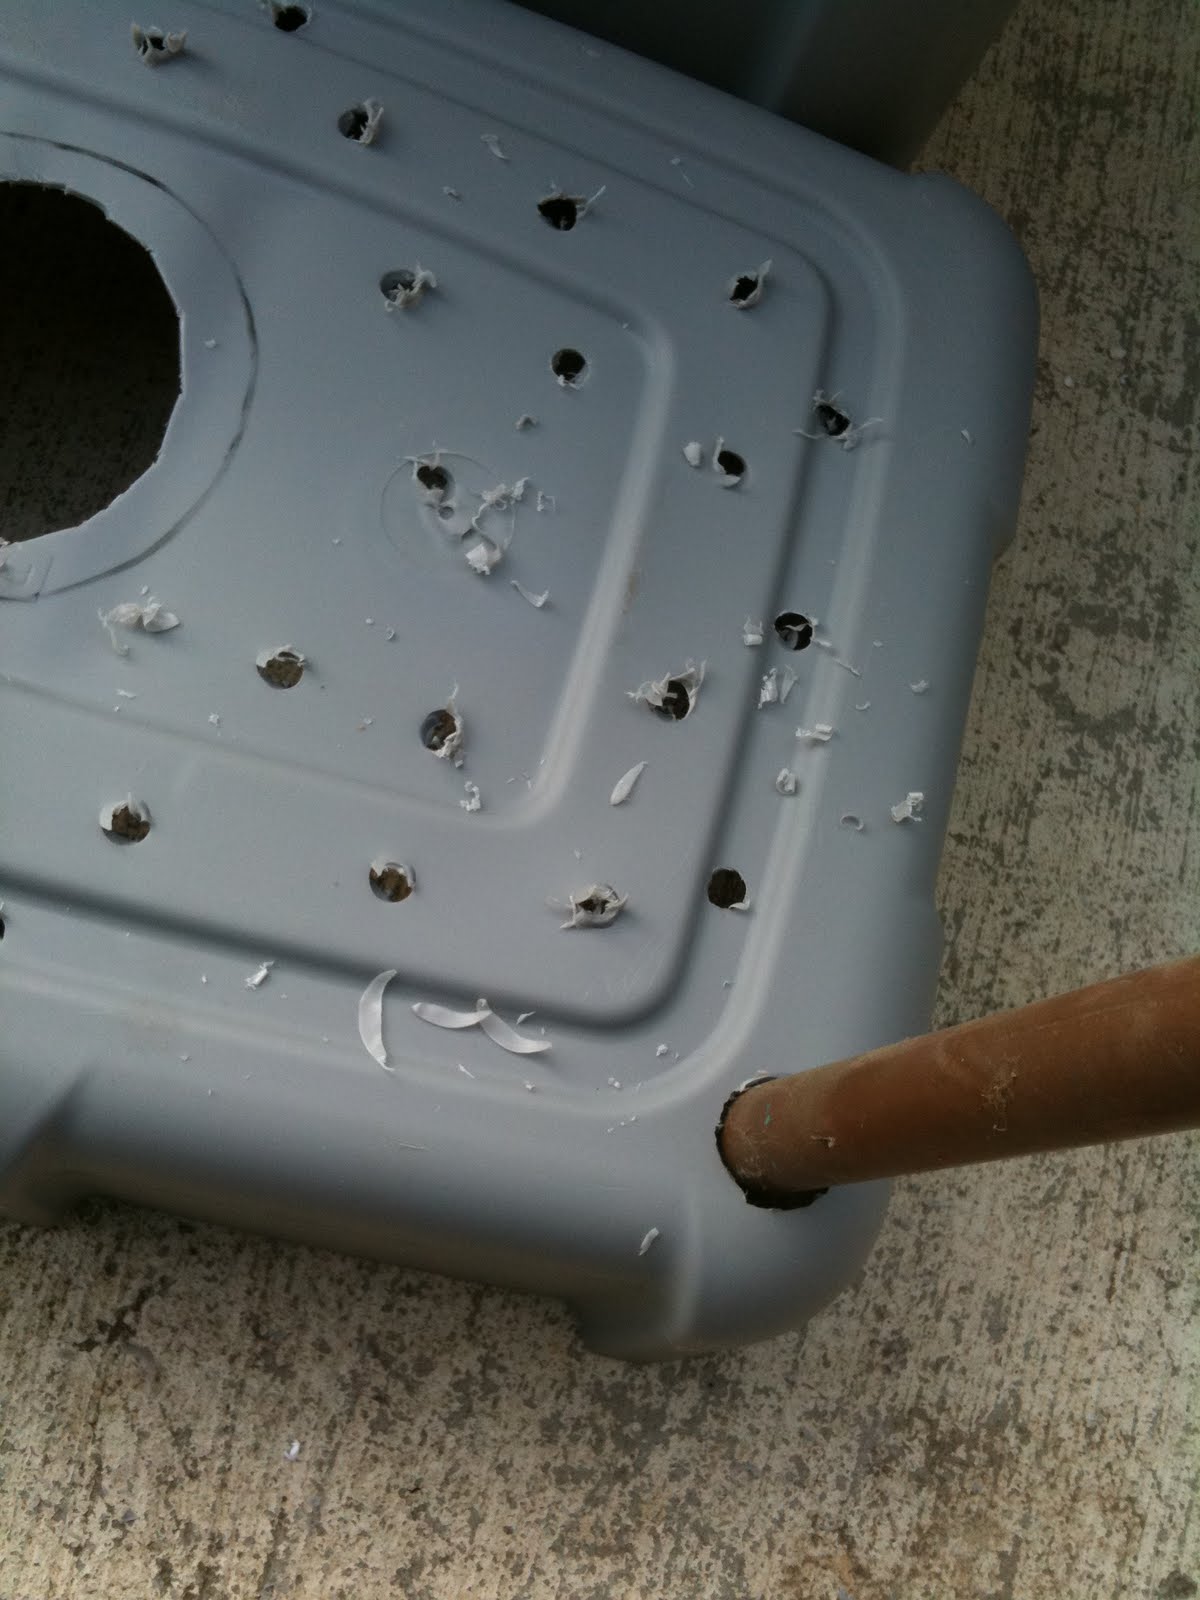
I had some leftover rebar from building the stairs.

So I drilled holes in the bottom of the base and pounded the legs in with a hammer

The whole contraption seems pretty solid. I could stand on it. I hope that I'm heavier than a couple bee hives.


This is my finger. I just thought it was a pretty color orange.


I found a place on the hill that is fairly out of the way but also easy to access.

I should have known any work on the hill would require digging.


I finally managed to get it level and firmly in place.


Now all I need is the bees.

Turkey Update

The turkeys are growing fast. They are much more rambunctious and run around a lot. The slates seem much more inquisitive and assertive than the royal palms, which seem almost demure.


I've noticed some differences between the poults and a chick. The poults seem to want to eat out of the hen's mouth. The hen makes her standard cluck to call them over when there's food and then taps at the ground to show them where it is. The poults focus on her beak and peck at that to get the food. A chick would peck at the ground. I've heard that turkey hens raise their poults much longer than a hen would. Maybe they feed them right from their mouths too. It doesn't seem to cause these poults any problems. They still peck the ground and eat out of the feeder. It just surprised me a little.

Saturday, May 7, 2011

Self Watering Containers

I finally got all of the supplies together to make some self watering containers. I actually got the bins a year or so ago but it took me a while to gather everything else. I'm using instructions from a guy named Josh that patterned his after commercially available containers.

The goal with a self watering container is to create a reservoir in the bottom of the container so that you don't have to water as frequently. In the hot summer I have to water the vegetables every day so this could be a great time saver. I also like that I can put them wherever I want. Right now I'm limited to the raised bed and some things take up a lot more space than they do dirt so it seems a little inefficient. I figured I could put the squash in these and if they start getting really big I can just move the containers apart. I can't do that in the raised bed.

Josh used pond baskets to create a wick from the reservoir but I couldn't find those so I used these containers from the fridge. I probably should have cleaned them out a long time ago anyways.


I also got some PVC pipe and a couple more bins.

It was only after I got home from the store that I read Josh's note that he no longer uses pvc. I guess that makes sense but I was unwilling to let anything interrupt my momentum after it took me a year to get started. Luckily he recommended some substitutions, one of which was copper pipe.

It just so happens that I had a pile of copper pipe. Not because I did any un-permitted plumbing work or anything. : /

I found three pieces that where long enough. I just needed to trim some bends off of one.

So I got to cutting and drilling and nipping. The reservoir is created by cannibalizing one of the bins. You cut off the bottom few inches and that gets flipped over and wedged into the bottom of another.


The yogurt container are filled with dirt and sit in the reservoir to draw water up to the plants above.


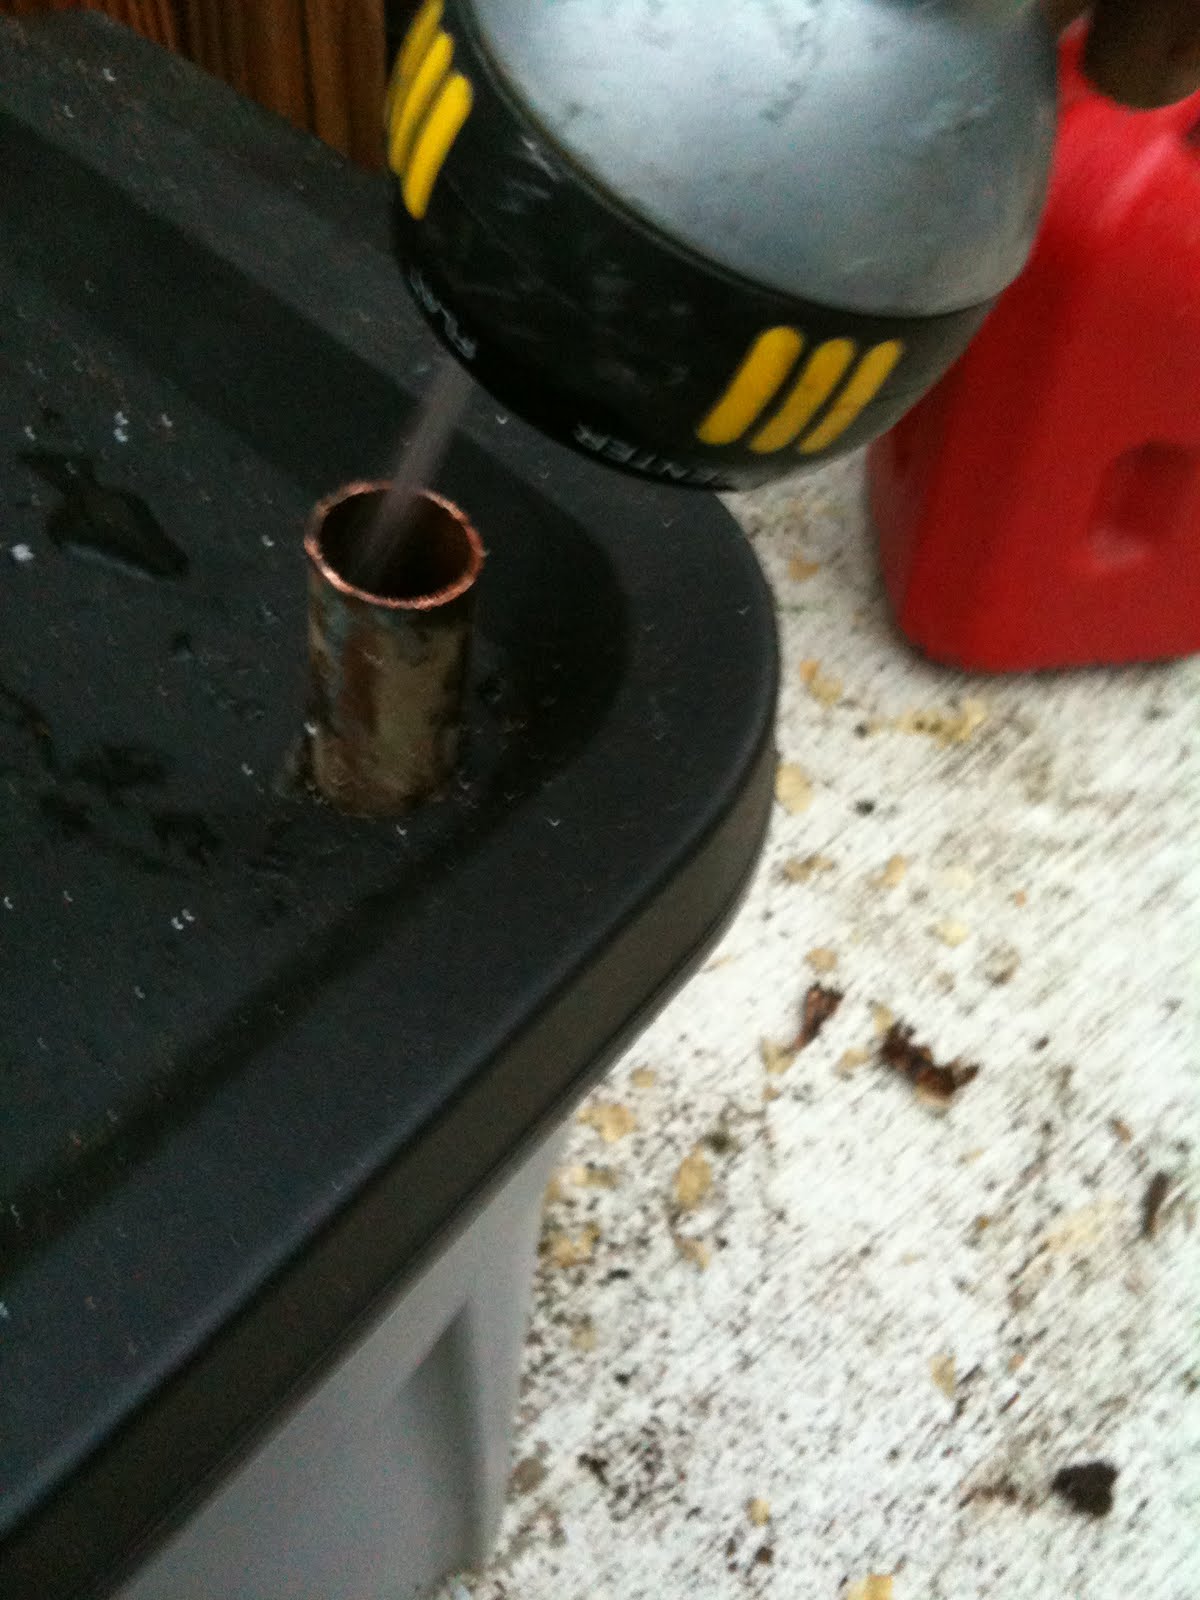
The pipe goes down into the reservoir so you can fill it from the top. I notched the bottom so the water could flow out easily.


To fill the containers I used a mixture of litter from the chicken coop, a commercial water control potting mix and perlite.


Here you can see the reservoir as it's covered with dirt.

I cut holes in the lid for the plants and added dirt until it came right to the top. I'm hoping that this will hold in more moisture.


I have a funnel but even with the smaller diameter copper pipe it's easy to fill.


There's a small drain hole at the bottom to keep it from getting too soggy.


I moved my precious baby squash into the containers. I know I'm supposed to weed out the weak seedling and leave the strong one to grow but it's hard for me to do. I convinced myself that I should wait to see how they adjust to their new circumstance and then make the decision.

I realized that most of my squash is winter squash so I pick up a green zucchini at the store. I also planted twice as many of the Golden Glory which is a yellow zucchini. Some of the seedlings already have little baby flowers on them. I think the first flowers are male so it will still take awhile before they start to grow fruit.

One of the reasons I'm trying these containers is that I'd like to have a little more diversity in my growing space. With only one bed I tend to have a Summer season and a Winter season where I let everything grow until it's done and ready to be pulled out. This doesn't feel very efficient and it leaves me with many months where things are just growing in and not producing. Ideally I'd like to have more overlap so that there are always mature vegetables in the garden.

I'll have to plan much better and start my seedlings earlier. I was reading another blog where someone was already picking their first harvest of tomatoes. I just planted mine, and although I had wanted to put them in their own SFC I ended up putting them in the raised bed where they can fight for space with the giant Swiss Chard.

I'd like to make better use of this space. It makes me happy to see all of my potted plants but I think it would make me just as happy to see a bunch of vegetables growing. I could move my patio furniture over to the shadier part of the yard and build a couple more beds here. I'd love to cut out the concrete and have more dirt to work with.

Everything takes time and money though. Speaking of which, after adding up the cost for the bins, the perlite, and the potting mix, the SWCs ended up costing me $24 each. That kind of sounds like a lot to me. The commercial ones sell for about $50 dollars. I guess the final verdict won't be in until I see how well things grow in them. I'm a little concerned about how these will hold up in the sun. When I lived in Vegas, anything vinyl or plastic that sat in the sun got brittle and cracked after awhile. If these things cracked I would be pissed. Maybe I should make little shade cozies for them until the squash leaves shade them.

It would be great if I could have ten of these that could always be in rotation. That adds up fast though and would take a lot of dirt and time. Just like they cost more than I would have expected they also took me longer to make than I predicted. Between buying supplies, hauling and mixing dirt, cutting and assembling, and planting the seedlings it probably took me 6 hours to get these done. I would have had to do some of that work even if I just bought them but $50 is sounding more and more reasonable.

Erik and Kelly at Root Simple have a version of these made out of 5 gallon buckets. I guess if I could get 20 buckets for free it might be worth it. They would also be a nice size for growing tomatoes, peppers, and other bushy things. Maybe I'll start making the rounds of donut shops to see if they have any extra strawberry filling buckets.

Monday, April 25, 2011

New Project #2

So I started another new project:

It's hard to tell because of the red heat bulb but those are turkey poults, not chicks. I've had some turkey eggs in the incubator for the last month but something went wrong and they never developed. Luckily, Alex's parents invited me to their house in Palm Dale for Easter and that is just a short drive to Lancaster. It turns out Lancaster is rotten with turkeys. Alex and I went to a ranch that had tons of chicks and ducklings and poults. They even had guinea keets which were tempting but I thought that might be pushing it. Guineas are so loud and I try to be a good neighbor. For some reason the rooster crowing just fades into the background but guineas' calls are designed to be piercing.

I ended up getting to Royal Palm poults:


And two Blue Slate poults:

In the photo at the top the Blue Slates are already a bluish gray color and the Royal Palms are all yellow. I got 4 hoping that at least two will make it to next holiday season.

I drove back from Palm Dale with a bottle of hot water in the box to keep the poults warm and it seemed to work OK but they really cuddled up to the bottle so I'm glad it was a fairly quick trip.

I debated how I was going to raise the poults, if I was going to put them in a brooder or try to get one of the hens to brood them. I always prefer to have a hen raise chicks because then she does all the work and I don't have to worry about it. But in the past the hens have hatched the chicks themselves so they felt attached to the chicks. This time I would be tricking the hen into accepting the poults by sneaking them under her like they just hatched there. I was lucky that the poults I got had just hatched that morning so they were still young enough to go along with the ruse. It was still possible that the hen could reject them though. A hen usually has to be broody for a couple weeks before she'll believe that an egg is hatched. I guess they instinctively know that a chicken egg takes 21 days to hatch. The hen that I wanted to use had only been broody for about a week. She is also very crotchety and a bit aggressive. Her aggressiveness would make her a good mother but only if she accepted the poults as her own, otherwise she might peck them and drive them out of the nest.

When I got home with the poults it was dark, which I hoped would make it easier to get them under the hen. I tried to ease them under her but by the time I got the fourth one in she was agitated and pecking at me. I closed the door and listened to hear if she settled down. It was quiet so I let them be for a while. I checked on them a couple more times before I went to bed and although the hen was always ready to peck my face off there was no sign of the poults so I figured they were firmly tucked under her ruffled feathers.

I had trouble sleeping so it wasn't hard to get up early in the morning to check on them again. Still no sign of the poults but hen seemed even more defensive in the light of day. Here she is puffed up to maximum size with her head twisted around waiting for me to enter striking distance.


You can almost see the fierceness in her eye.


I decided to brave her horny beak and was eventually rewarded by this little fluffy head peaking out. That's one of the Royal Palms.

I went to work but still worried about the poults. It was possible that the hen was just protecting her nest and didn't feel any attachment to the poults. She could just stay on the nest and never take the poults out to eat and drink. She could leave the nest and not return, leaving the poults to die from lack of heat. She could peck them or step on them or do other damage. It made for a long day of worrying and I rushed up the steps when I got home.

The hen was sitting in the dirt of the run with the same angry look on her face. I suspected that the poults were under her but I checked inside the coop just in case. The coop was empty.
I sprinkled some chick starter in front of her and she took a couple big beakfuls of it and made little chirping sounds. As soon as she made the noise the poults darted out from underneath her to see what she was eating. She went on to show them how to drink and then led them back to the little pile of food. All my worrying for nothing.


After that she made a bee-line for the coop and called for the poults to follow her. Unfortunately they couldn't figure out how to get into the coop with her. Maybe they weren't strong enough to jump up.

And then this awful thing happened:

It was hard to watch the little guy getting trampled but I guess these little dramas must get played out repeatedly during the day. I'm sort or glad I'm not around to witness it more.

I made a little dirt ramp thinking that they might be able to get up if there were smaller steps.


The hen decided she had had enough though and came back out and sat on top of the poults. I couldn't get her to budge and they spent the night in the run.

Now that I think of it the last hen spent the first few nights in the run with her chicks. Maybe they were all too small to get back in.

Update 4/27/2011:
The ramp must have worked last night. The hen and poults were all in the coop when I got home from work last night. They came out in the morning though to enjoy a little sunlight:


Update 4/28/11:
The poults are so much more active in just a couple days. They have no problem jump up and down the ramp to get into the coop.

Saturday, April 23, 2011

New Project

I started a new project today:


Bees! Well, no bees yet but I put my hive boxes together. It looks so cute, it actually has a happy face on the front. I still need to paint it and find a place in the yard for it but I'm hoping to get some bees in there soon.


I also had the chance to go visit a nearby beekeeper with some new friends I met at the chicken group

The bee suits are so flattering, and although I was covered from head to toe I still felt a couple spikes of panic when a bee kept head butting me. Everyone else was really calm and relaxed. Maybe that comes with time.

There were 6 different hives here and the beekeeper said that they all have distinct personalities. I didn't realize that bees could be so different. There are lots of swarms in LA right now so once I get set up and put my name of on the list hopefully I can get a nice friendly group of bees.

Update 5/03/11:

I finally got the boxes primed and painted. I just need to make a base for it to sit on and I think I'm ready for bees.

I wanted to pick a golden color so it would blend in a little on the hill when the grass has turned yellow. This color is actually called golden honey. A bit twee but I think it looks nice.

Sunday, April 17, 2011

Summerizing the Chicken Run

It was 92 degrees yesterday so I decided to make some changes to the chicken run. I've had plastic covering the run for the past couple months because of all the rain we were getting. Wet chickens and wet chicken runs are no fun.


I just stapled the plastic down through a piece of duct tape. It seemed to work well and gave the chickens more dry space to run around in.


I took the plastic off because I was concerned that it might be trapping heat and restricting the air flow too much.


I replaced it with some shade cloth from my old roof garden. It should allow the air to move through but will cut the intensity of the sunlight.


I left part of it uncovered so I could access the door and also to let some sun in. Chickens like to bask in the sun sometimes. It must give them vitamin D or something. Chickens are pretty good about regulating themselves though so I figure if then need sun they can work out their own basking schedule. In the height of the Summer most of them will be seeking the shadiest spot though. Luckily the coop is on the east side of the sopote tree so by 1:00 or 2:00 in the afternoon the whole thing is in shade.

My plan was to plant a grape vine over the run that would grow in the summer to provide shade and then lose it's leaves in the winter to let the sun in. I never managed to get the plant in the ground last year though. I'd sort of forgotten about it until I saw it's little tendrils climbing up through the A. desmenttiana and Mangave Macho Mocha.

This is a plant that I got at the Theodore Payne Foundation called Robert's Red. It's a hybrid that is drought tolerant and turns bright red in the fall. It's so pretty that I sort of want to plant it closer to the house. It's grapes are supposed to be more palatable than full natives but it has some of the disease resistance of it's native parent.

Seedlings

I planted some squash seeds a couple weeks ago. I ordered a bunch of powdery mildew resistant varieties. I've had pretty good luck with my squash every year but because of our cold nights they always develop mildew halfway through the season. We'll see how these do. I got some yellow zucchini, a couple of hybrid acorns, a fancy weird pumpkin, and my favorite, butternut. They are all winter squash except for the zucchini but even the zucchinis I've grown have over wintered pretty well.


After two weeks the seedlings are just starting to push their way out.


And this is 3 days later. Yowza!

I planted a lot more than I need hoping that I can give some away. I have a lot more seeds stored in the fridge too. The minimum order for each kind was about 250 seeds and so far I've only used about 10 so if anyone is interested in trying these out let me know.


While I was in the seed planting mood I decided to give these Echium wildpretii seeds a try.


I put two or three seeds in each little container and then covered them with a little more dirt. I had about 60 seeds.


The instructions said to cover them with plastic until they germinate. I kind of want to hide them somewhere where I won't have to see them all the time. I'm dying of anticipation.


This is what they look like when they bloom in their second year:

!!
Wish me luck.

Update 5/03/11:

It's been a couple weeks and the squash are still doing well. They are getting their true leaves now. I have to figure out where I'm going to put them. I'm going to make some self-watering containers but I'd like to choose an out of the way place for them. Most of them are bush varieties and not viney but I don't really know what to expect. The first year I grew butternut the whole front yard was covered in it. The vines must have been 35 feet long. I can't image having ten times that amount.

After two weeks I also found this this morning:

It's one little Wildpretii seedling. See it there by the edge of the pot?

By the time I got home tonight there were 4 move just popping out:

They're still not much to look at but I'm encouraged that they're sprouting. I wasn't sure what to expect and was getting a little discouraged that nothing had popped out. I guess the squash took two weeks too. I'm really going to have to work on my patience if I'm going to wait two years for these to bloom.